Having just sculpted a male echorche before this I was eager to do some first attempts at female anatomy as well. However as it would be a fully armoured soldier in the end, plus I really felt that I didn't have so much time I decided not to define it so much, the volumes and planes were anyway the most inportant part.
I knew I wanted a strong and large soldier, capable of beheading an Ork and the anatomy cheat sheet I used was such with pretty muscular shoulders. To make your own cheat sheet just print out an anatomic drawing in the correct scale. This drawing can be taken from an anatomy book like I did or you can draw it yourself. Then I translated the proportions to the sculpture using a caliper.
However our bodies are so varied and different and unfortunately the anatomy books most often don’t reflect that. People sometimes complain about not being able to mix scales from different eras or manufacturers. While some of that might be true, it can also sometimes be quite sobering to look at the real differences. This is a photography series that is especially illustrative I think.
The topic of Anatomy is a long one and I am only just beginning with the topic. But I got some amazing in-depth teaching during the class I went to while sculpting this miniature so I think I at least have something to say on the subject.
For now I will only give two major learnings, in the future as my knowledge and confidence improves I hope to get back to this subject.
First of all, use good anatomy references. As we discovered, with our teachers help, a lot of the anatomy books and also anatomy models are off, sometimes by a large margin. I think it’s due to that people are using the same faulty references to begin with and just not putting in the amount of time you need for this quite daunting topic. Anatomy is like the most complicated 3D puzzle available and while you can of course simplify and stylise the references you use in the first place should be correct. So before buying an anatomy model, make sure that it is not a $200 book stand. I for example bought some anatomy reference sculpts by a very good miniature sculptor and they were indeed very nicely sculpted but unfortunately incorrect and as such not useable for reference. Read reviews, there is always some anatomy nerd who has commented and then try to find other books or models, or if it’s just a few mistakes, find alternative references for these parts.
However also remember from above that people look different. While some parts, like where the muscles attach etc. should be similar the proportions are not. The size of an individual muscle depends on many things, most obvious what exercise he or she gets but also just from genetic heritage. Some parts are more individual than others, just google abs (Rectus abdominis) and marvel at how different the proportions of the muscles can look on well trained individuals.
The anatomical human and the porportions found in anatomy books are in some ways a very fictional human. It’s not a scientific average of any sort and is burdened by a long history filled with ideas how an ideal person ought to look. Mainly you will also find that the basic form is the male anatomy and when they discuss females they just give some pointers on how to change the male one which is quite irritating.
I would also suggest not to use medical books in general, use good ones aimed at artists. It is very important to understand which muscles that gives volumes and not get bogged down on the multitude of muscles that will not show up on the majority of people.
The main text we used in our class was Elliot Goldfingers - Human Anatomy for Artist. It is a very thorough anatomy reference book with precise schematic drawings and great photographs. For sculpting it is amazing, it should be the first book you get. However even this book is not perfect. The drawings are a bit flat, the skull is not good and you get almost no good reference drawings on movement and poses which is, kind of, the real difficult part of anatomy. Also, very few drawings of the female anatomy. Two other, classic, books we used while sculpting the ecorche was Peck and Richer. I actually think the more the merrier, it's interesting to see the slightly different takes on things.
The main reference book I used while sculpting this miniature was another one though, Classic Human Anatomy by Valerie L. Winslow. It is also precise and a great complement to the other books as it contains nice drawings of movement, a lot of gestural drawings, actual females (woahh). It doesn’t contain photographs though and it is more aimed at drawing. A final book I should mention is Michael Hamptons Figure drawing: Design and invention. I find the drawings very helpful in simplifying anatomy and form.
I printed a lot of reference images of the pose I wanted and I even got some help with posing from some of my classmates. The always keen eyes of Jim Vikström, our anatomy teacher, was of course also very helpful.
If you have any anatomy resources that you really like, please let me know! :) It’s always nice to have more information on the subject.
My second learning is to measure your heart out. Really. And make sure that the primary volumes and the associated planes are correct, that is the most important part. But working in smaller scales there is also some pitfalls, the 7.5 heads makes a body thing doesn’t work in general for example, it looks off because you are not likely to capture the rest of the volumes entirely in scale. Tim Meier is one of the few sculptors I’ve painted managing this in 28mm.
Again, when sculpting, using a mirror or reversing an image in an image editing software highlights the problems in general and I think that you should trust your eyes rather then the measurement then.
This part of sculpting was very exciting because I didn’t know if the measurements I had made would turn out ok or not and it was kind of the birth of the figure. Before it was just measurements and volumes, now it became flesh.
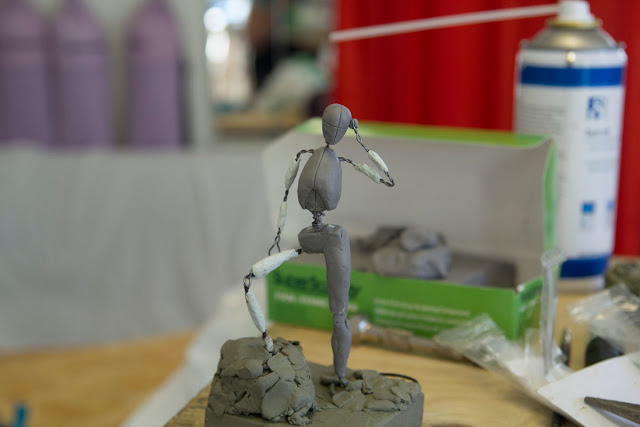
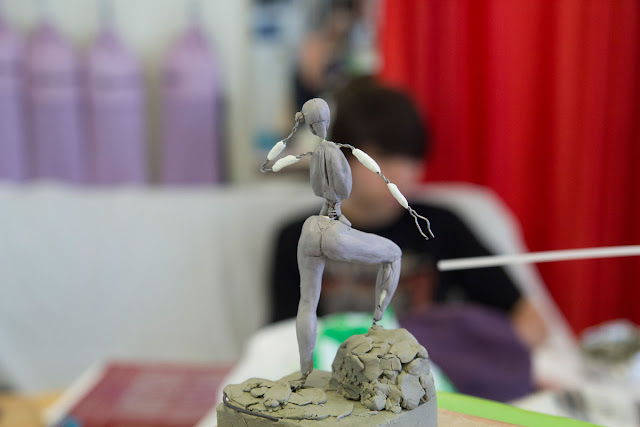

The lines I draw are for proportions and making sure that halves of the body are similarly sized.
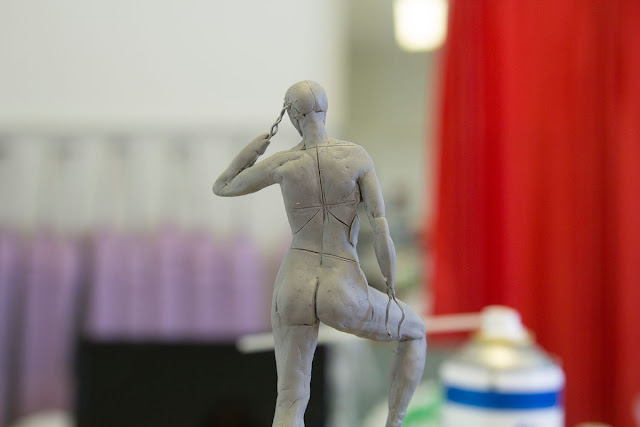


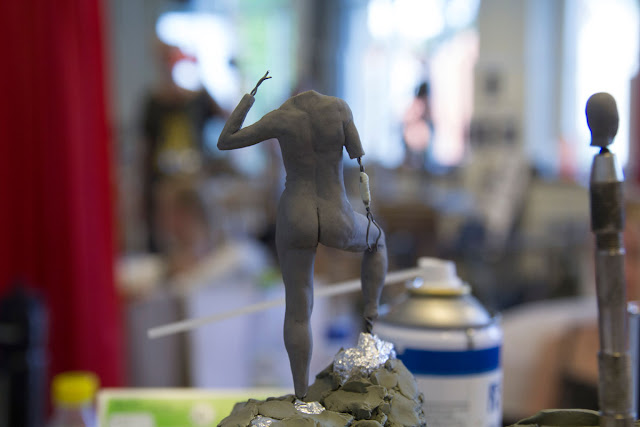
I left the right arm loose as I wasn't sure what final pose I was going to have for that arm which would be holding the sword.

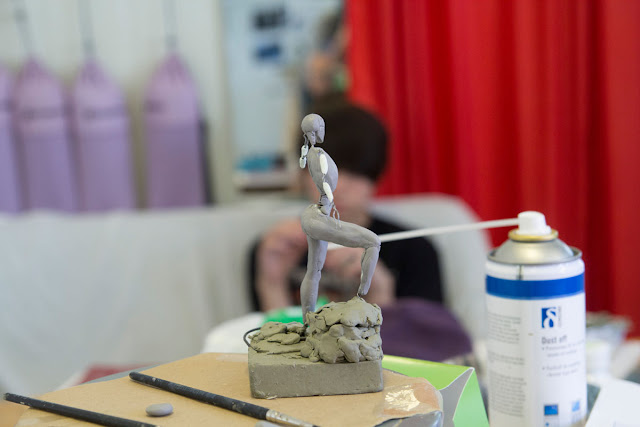
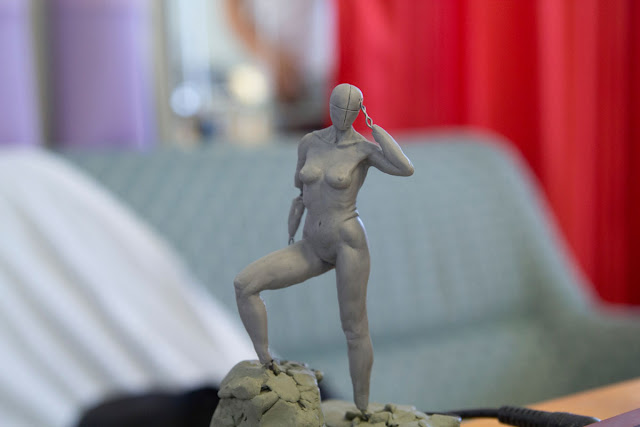
This is how it looked after the first baking. Not too bad I think.
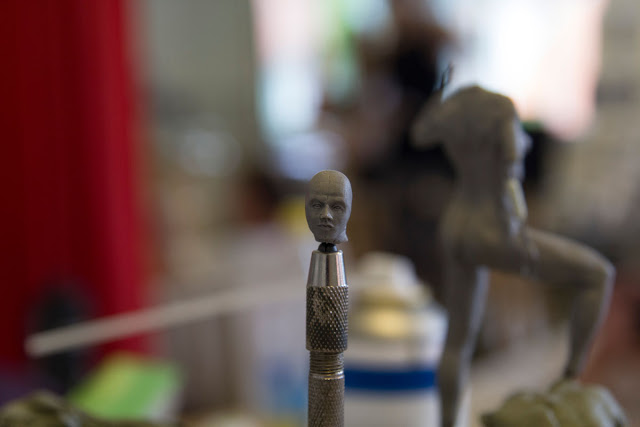

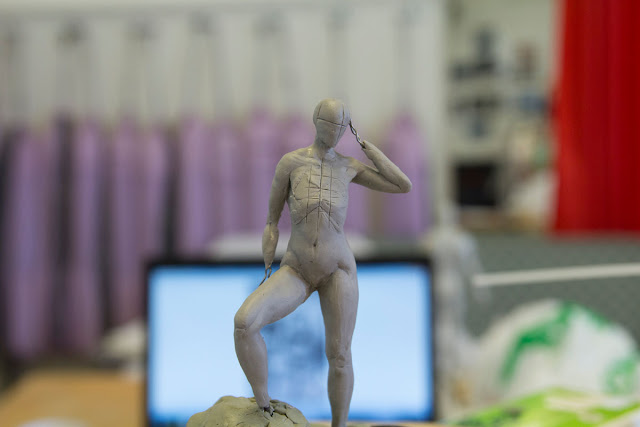
As you probably can see the head looked too small already in this step, but I was stubborn and thought that maybe my eyes was off because I had painted so many smaller miniatures. But adding bulky armour didn’t help at all (who would have thought?). So in the end I had to resculpt the head.
If you have any anatomy resources that you really like, please let me know! :) It’s always nice to have more information on the subject.
My second learning is to measure your heart out. Really. And make sure that the primary volumes and the associated planes are correct, that is the most important part. But working in smaller scales there is also some pitfalls, the 7.5 heads makes a body thing doesn’t work in general for example, it looks off because you are not likely to capture the rest of the volumes entirely in scale. Tim Meier is one of the few sculptors I’ve painted managing this in 28mm.
Again, when sculpting, using a mirror or reversing an image in an image editing software highlights the problems in general and I think that you should trust your eyes rather then the measurement then.
This part of sculpting was very exciting because I didn’t know if the measurements I had made would turn out ok or not and it was kind of the birth of the figure. Before it was just measurements and volumes, now it became flesh.


The lines I draw are for proportions and making sure that halves of the body are similarly sized.


I left the right arm loose as I wasn't sure what final pose I was going to have for that arm which would be holding the sword.


This is how it looked after the first baking. Not too bad I think.


As you probably can see the head looked too small already in this step, but I was stubborn and thought that maybe my eyes was off because I had painted so many smaller miniatures. But adding bulky armour didn’t help at all (who would have thought?). So in the end I had to resculpt the head.

Inga kommentarer:
Skicka en kommentar